Showing posts with label PC Tricks. Show all posts

June 16, 2012

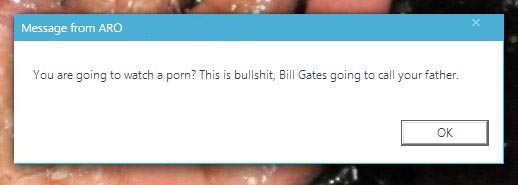
Display Pop Up Message in Your Desktop

A pop-up is a graphical user interface (GUI) display area, usually a small
window, that suddenly appears ("pops up") in the foreground of the visual interface.
It is a simple code which will accept the name of the user as well as show
in the pop up message.


First open notepad and write the code below

@ECHO OFF
title LearnTricks.in - Technology Blog
:s
echo Please type your name!!
set /P name=
:disp
cls
title
LearnTricks.in - Technology Blog
msg * "Hello %name%, all your data in this computer are hacked by Aro Mukherji"
msg * "LoL... I am just kidding"
msg * "Thank you for trying this."
msg * "Visit www.learntricks.in again."
:exit


Now save it as "anyname.bat". Then copy and paste it in your friend's startup. Now the message is dispayed each time he switch on his system.

You can change the pop-up messages and troll your friends with serious warnings!!
Have fun................. ;) 

More hacking tricks : Click here    More how to tutorials : Click Here 


May 14, 2012

How to Run Android Apps in Computer


The success of Android operating system is gradually depend upon the apps they are running. Android Market has really very cool and handy Apps which are daily used by millions of people. As the popularity of Smartphone’s and tablets increases, so the uses and dependencies is on the apps available for them. Whether the App is a hot game, a handy price checker, or a useful contact manager, the constraints of Smartphone and tablet designs and interfaces have forced app developers to find creative ways to present and access data. But unfortunately, most apps created for Smartphone’s or tablets aren't available for use on a PC. But here is the solution; there is a one company called BlueStacks in California who releases the Alpha version of app player which is the software or what we say an emulator for the Android Apps. The BlueStacks app player essentially runs an instance of Android in a virtualized environment on the PC, so the apps act as though they're running on a mobile device. So follow the steps below to run the Android Apps in Pc.

Download BlueStacks and Install

Step1: To use the BlueStacks app player, you must first download it from the BlueStacks website.
Step2:  Installer is light weight around 3 MB and it downloads in snap. Just follow the instructions and it install’s in little moment.

Keep in mind that the BlueStacks app player is still in the early phases of development, so you can expect some minor performance issues and perhaps a bug or two.
When the installation is complete, you'll see a short video describing how the BlueStacks app player works and how you can access a few key features, Just skip it.


How It use?

To use BlueStacks and to transfer the android apps from your computer. You’ll have to register for a free BlueStacks account with either a working email address or a Facebook account. The main allure of the BlueStacks app player is its ability to send apps from your Android device to your PC via the company's Cloud Connect mobile app and servers.

 When you register an e-mail address or Facebook account with the BlueStacks app player, the service will link a personal identification number (PIN) to your email account. To transfer apps from your Android device, launch the Android Market on your Android tablet or Smartphone, and search for BlueStacks Cloud Connect. Download and install the Cloud Connect app on your phone or tablet; don't worry-- it's only 402KB. With that app in place, you can send any other app that's installed on your mobile device to the BlueStacks app player on your PC. Essentially, the Cloud Connect app uploads selected apps from your phone to BlueStacks' servers, where you’re PC can then access and download them to your PC.

To use BlueStacks Cloud Connect, simply launch the BlueStacks and select the Android apps on your device that you'd like to upload for transfer to your PC. Then click the Sync button at the top of the interface, and wait for the apps to upload (all of thae apps installed on the mobile device will be listed). The uploaded apps should be visible in the BlueStacks app player on your PC when you launch the 'Get More Apps' tool.

Once your apps are uploaded and the app player has notified you that they're available, select Get More Apps from your BlueStacks app player's PC client and click the Cloud Connect link. From there, a screen should pop up that lists all of the apps you uploaded from your mobile device. Click the Subscribe button underneath each app, and you should be able to run your favorite Android apps from the app player on your PC.
Here what I am running. Hope you like the post and enjoy the Android apps on your computer.

May 13, 2012

Convert File Format Without Using Any Software


Converting a File into different format is our day-to-day need, we use to convert various video formats to make a compatibility with our Phone or sometime we used to convert it to save our Disk Size. Same is in case of the Images; we use to convert the Image to .PNG or other suitable format to save the Disk Space or to make the image light weight to send online via mail. It happened to me many times that I wrote the Document to Other file format and trying to open it to Microsoft Word or in some other editor but can’t succeeded as it won’t allow and not supported that format. So for that I used to download the converter to make that document compatible to Microsoft word or for some other editor.
Here I found something which is really a good one and time-saving. The website called zamzar.com is the online utility which is basically an online format converter. Yes you can convert almost all type of Docs, images, videos into a format which you wish.”zamzar.com” is supporting various useful formats; some of popular are listed below:
  • Convert a .jpg image into a .png, .gif, or .bmp, etc.
  • Convert a YouTube video into a .avi, .mov, .3gp, .flac, .m4a, .wmv, etc.
  • Convert a .docx to a .doc, .pdf, .html, etc.
  • Convert a .pdf into an e-book format your e-reader supports.
  • Convert a .rar into a .zip
So here you go a simple tutorial of the Format conversion using the zamzar. I want to convert a file say any PNG image to JPG file. Let show you how to do it.
  • Visit the zamzar.com
  • Scroll down and you will see a Tab interface which has some options like choose a file and select the converting format etc.
zagzar utility How to convert the File Format without using any software
  • Select the Appropriate file (I prefer you to use some small size image to test rather than the HD Video). Once you selected a file it shows you the selected file on a bottom of page.
file to convert How to convert the File Format without using any software
  • Now select the Format on which you wish you convert your file and enter your mail ID. Mail id is for sending the Converted File.Here what i choose.
selection of file How to convert the File Format without using any software
  • Now once you done with uploading the click on convert Button. Once you click there a window pop ups (as shown below ) and it will alert you about your operation. Just click on Ok.
alert of page How to convert the File Format without using any software
  • Now zamzar upload your File on their web server and convert them into a format which you have been selected. Just wait for a minute.Once the conversion completes then it alert you about the process.
fileuploadcomplete How to convert the File Format without using any software
  • Now once the conversion completes then they will send you a mail containing your appropriate data. Check your mail and download the file. Here what I got in my account.
mymail How to convert the File Format without using any software

So that’s all for now. Hope you enjoy this article and this website too. Convert any File format to other without caring about special tools and Hazards of installation.

March 31, 2012

Hide Any Folder In Windows Without Any Software

Today my post is about How to hide folders in windows without any software. This is very easy and secure trick because you are the only one who know the actual path of the folder.

Follow These Steps :
To Hide A Folder:
  • Open Run cmd.exe (command prompt) in administrator. 
  • find out the path of the folder which you want to hide with name.
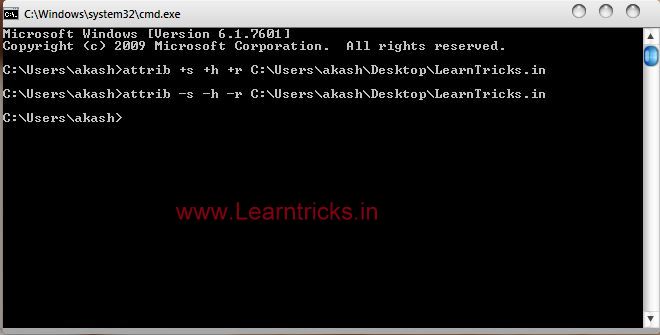
  • Now type a command like this : attrib +s +h +r "path of the folder"
     eg: attrib +s +h +r C:\Users\akash\Desktop\LearnTricks.in
  • press enter! your folder has been hide. 
To UnHide A Folder:
  • to access visible  again the folder type command like this: 
            attrib -s -h -r "path of the folder"  
 
          eg: attrib -s -h -r C:\Users\akash\Desktop\LearnTricks.in
  • Press enter.Now your folder will be visible.
 

March 27, 2012

Transform Windows 7 into iOS with iOS Skin Pack

If the appearance of the iPhone, iPad and iPod is lost and you want to have similar appearance on your Windows PC then iOS Pack is the best choice for you. It’s a transformation pack that helps you to bring Apple’s iOS devices look of to your Windows 7 computer. iOS Skin Pack changes the overall appearance of the operating system including boot screen, login screen and Windows Explorer. The package also includes cursors, wallpaper, icons, visual style and some extras. Below are the steps for transforming Windows 7 into iOS with iOS Skin pack.

  1. Before installing iOS Skin Pack on your computer, you should create a system restore point, disable the User Account Control (UAC) and close all open programs.
  2. After performing the above recommendations, just download iOS Skin Pack and run the file setup (exe) that you downloaded to start installing the packet processing on your computer.
  3. The installer offers quick installation (Quick) and Custom (Custom). The custom installation allows you to select the components of the packet processing you want to install on your PC.
  4. The package also includes the UxTheme Patch file needed for the installation of third-party themes in Windows 7.
     5.After completing installation, restart your computer to apply the look of Windows 7 iOS.

How to Transform Windows 7 into iOS with iOS Skin Pack


Check-out more services from us -  For Hacking tricks : Click here | For Android Tricks : Click here | For How To Do Tutorials : Click here | For Gadget reviews : Click here | For Internet Tricks : Click here | For Windows tricks : Click here. You can like us on Facebook or Follow us in Twitter to stay connected with us.

Fix- windows explorer has stopped working

When you are trying  to install/uninstall any applications from Windows 7, or even while trying to update the operating system by using Windows Update, the system could get stuck or crash causing Windows Explorer or even Windows Installer itself to give the user the following error messages: “Windows Explorer has stopped working” -  “Windows Installer has stopped working”. 

For this problem Windows 7 unable to find a proper solution, and a message will show: “Windows is checking for a solution to the problem…”  followed by “Do you want to send more information about the problem?”. To fix the problem follow the steps.
  • Click Start.
  • In the Search Bar, type regedit and press Enter.
  • Locate the following key: HKEY_LOCAL_MACHINE\SOFTWARE\ Microsoft\ SQMClient\Windows\DisabledSessions
  • In the right pane delete this subkey: MachineThrottling
  • Turn your computer off and back on for the change to take effect.

March 20, 2012

Recover Old Deleted Files via Tuneup Utilities

In previous post I have already told about Tuneup Utilities 2012 Free 
Now to Recover permanently deleted
 items by TuneUp utility 2012 you have to follow these steps:
STEP 1- Open Tuneup Utilities 2012 and click on 'Restored deleted files'.


STEP 2-Select drive from which you want to recover the files.


STEP 3-a box will open 'what to you want to
 search for'.
Now click on 'show only files in good condition'.


STEP 4-You got the result of permanent deleted files just
 select from that data (You can multiple select files to recover)


STEP 5-Now click on 'Restore' option.
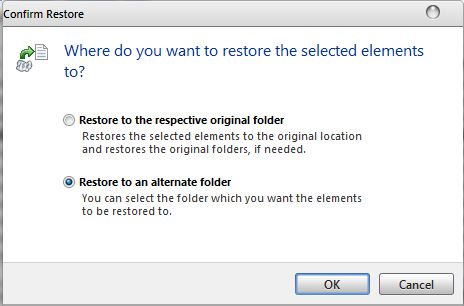
STEP 6-Now you have to select the folder to restore the files.


STEP 7-You can save the files in desktop.


njoy frnds.......:)

March 17, 2012

IDM Cracker Tool : Update and Crack IDM Easily

As Internet Download Manager gets updated very soon, it needs to be cracked again and again. So we have a tool that makes the updating and cracking of IDM very easy. The whole work is done by the software, you just need to click the right options.


Crack-IDM-With-IDM-Cracker-Easily_thumb%25255B1%25255D
IDM Cracker Tool


Steps To Have Latest Version Of IDM Fully Cracked :
  1. Download and install the latest version of IDM. Ignore if already installed.
  2. Download IDM Cracker Tool.
  3. Press the Start button. The IDM Cracker tool itself will do all the work.

When Updating Again When The New Version Arrives :
  1. Run the IDM Cracker Tool.
  2. Press the Update button , this will allow you to update your IDM.
  3. Click on check for updates in IDM so that it can update itself.
  4. After the update is complete and new version of IDM is installed, again open IDM Cracker Tool and click on Start. That’s it. Your IDM is again fully cracked. Repeat these steps whenever new version of IDM is launched.

Windows Loader v2.0.9 Genuine Crack Activator


Windows Loader is an application used to bypass WAT (Windows Activation Technologies). The application itself injects a SLIC (System Licensed Internal Code) into your system before Windows boots , because of which your windows behaves as a genuine copy.

Supported operating systems :
  • Windows 7 Ultimate
  • Windows 7 Ultimate E
  • Windows 7 Professional
  • Windows 7 Professional E
  • Windows 7 Home Premium
  • Windows 7 Home Premium E
  • Windows 7 Home Basic
  • Windows 7 Starter
  • Windows 7 Starter E
  • Windows Vista Ultimate
  • Windows Vista Business
  • Windows Vista Business N
  • Windows Vista Home Premium
  • Windows Vista Home Basic
  • Windows Vista Home Basic N
  • Windows Vista Starter
  • Windows Server 2008 Enterprise
  • Windows Server 2008 Enterprise (Hyper-V)
  • Windows Server 2008 Foundation
  • Windows Server 2008 Standard
  • Windows Small Business Server 2008
  • Windows Storage Server 2008 Standard
  • Windows Server 2008 R2 Enterprise
  • Windows Server 2008 R2 Foundation
  • Windows Server 2008 R2 Standard
  • Windows Small Business Server 2011 Standard
Loader_thumb

Note : Turn Off your antivirus before downloading and turn it on after installing the loader.
Compatible with both 32 and 64 bit systems.

(If the link says file deleted, tell us, we will update it as soon as possible!)

March 15, 2012

How to Remove Passwords from PDF Files

Some PDF files come with restrictions that limit our work. We can’t print, copy or edit the content of an encrypted PDF file. And this could be the case even when you have the legal right to modify the document or copy from it that are protected by a long and complex password. You know the passwords but it still feels inconvenient and boring typing them each time you have to open a PDF file. 


There’s a free Windows utility called BeCyPDFMetaEdit that can help you remove passwords from PDF files* but without make any other change to the document. (I am not sure why the developers picked such a complex name for this useful utility).
  
To Remove Passwords from your PDF Files
1. Downaload BeCyPDFMetaEdit & Install it on your PC.

2. Launch the program and it will ask your for the location of the PDF file.

3. Before you select and open the PDF, change the mode to “Complete Rewrite.”

4. Switch to the Security tab and set the “Security System” to “No encryption.” Click the Save button and your PDF will no longer require a password to open.


Note: - To Remove Password From PDF File, You have to once enter the correct password on BeCyPDFMetaEdit.

For Hacking tricks : Click here | For Android Tricks : Click here | For How To Do Tutorials : Click here | For Gadget reviews : Click here | For Internet Tricks : Click here | For Windows tricks : Click here.
You can like us on Facebook or Follow us in Twitter to stay connected with us.
 

March 8, 2012

Add Shutdown, Restart and Log Off Tiles in Windows 8 Start Screen

Regardless of whether you are an Apple lover, Google guru or an old faithful Microsoft worshipper, the current technological climate represents an excellent time to be involved in, as a user of hardware and software. The majority of the major players in the tech business seem to have some exciting new pieces of kit about to hit the public eye, with Apple set to imminently launch the new iPad and possibly Apple TV, Google looking likely to seed their new Android Jelly Bean in the coming months and Microsoft finally releasing the Consumer Preview of their new Windows 8 operating system.

How to Shutdown, Restart or Log Off in Windows 8

As Amit Agarwal said on labnol.org:

The regular approach I this. As there are no “shutdown” buttons in Windows 8, you can switch to the desktop view and press Alt+F4 to bring the Shut Down menu or the other option is that you press the shortcut key Win+C, go to Settings –> Power –> Shut down.
That’s too many steps especially when you are in a dual-boot environment and need to switch from one OS to another.
Wouldn’t it more convenient if you could create simple tiles – like any other metro app – and place them on the Windows 8 desktop so that you can Shut down, Log off or Restart your Windows 8 computer with a simple click (or tap).
Enter CreateButtons.vbs – this is a simple utility (or rather a script) that will automatically add Shut Down and other related buttons to your Windows 8 screen. There’s no installation required – just download the file to your desktop and double-click to create the various buttons.

Also, here’s the full source code of the VB script in case you are curious to know what it does behind the scenes. It may not be the most efficient piece of code but it will do the trick.

March 6, 2012

How To Delete Locked Files

Have you ever face a situation situation where you wanted to delete or move a file, but Windows simply wouldn’t allow you to do it?

  • Cannot delete file: Access is denied.
  • Make sure the disk is not full or write-protected and that the file is not currently in use.
  • The source or destination file may be in use.
  • The file is in use by another program or user.
These messages commonly appear when you’re trying to delete files.
The main reason behind this is that the explorer.exe process locks files that are in use, effectively preventing you from deleting them.
To solve the problem Download LockHunter
 You’ll notice that right after installing the software, a new option named "What is locking this file?" will appear when right clicking any files or folders in Windows Explorer.
To unlock a locked file, just right click it,then click on "Unlock It!" now you can also able to delete the file by clicking on "Delete It!"

I hope this solution will help you.

March 5, 2012

The application was unable to start correctly (0xc000007b) : Solution

Two days ago I was working on a C++ project using OpenCV, when suddenly my project couldn’t run anymore!
I just have changed my OpenCV dlls to parallel version and ended up with this Error: "The application was unable to start correctly (0xc000007b). Click OK to close the application." every time I tried to run my application.


After some hours of hard search I found that 0xc000007b error didn’t come from an exception in my code or even OpenCV dlls. I found that the error is just wrong configurations and the solution is easy, so I decided to write this article to show you how you cans solve this error permanently.

The Problem

0xc000007b error comes mainly from mixing up 32bit environment with 64bit one, that is you have an 32bit application that tries to load a 64bit dll.
To see exactly who cause this you must examine your application dependencies carefully.
I used a free portable program to do this: "Dependency Walker". After you download it you can open any PE file (exe, dll, …)
Open your application executable file (in my case "testopencv.exe") with dependency walker, you sould see something like this:


As You can see, dependency walker shows all dlls my application depends on, and all dlls these dlls depends on and so on…
Now you must check these dlls to see which one is 64 bit? If your application works fine you should see nothing, but when your application throws 0xc000007b error that means you have at least one 64 bit dll in these dlls.
In my case as you see, my application depends on cv2010d.dll which depends on tbb_debug.dll which is 64bit dll (notice the 64 number near its icon). You can see the properties of any dll to find its path, my tbb_debug.dll lies on: "E:\Intel\Compiler\11.154\tbb\intel64\vc9\bin".

The Solution

But why cv2010d.dll links to 64bit version of tbb_debug.dll instead of 32bit one? and how can we change that?
The answer is that most exe or dll have it is dependencies names only not their paths (that is what we called dynamic linking). So finding the real path of these dependencies done in runtime, and in our case that cause the problem.
When I run my application it tries to load cv2010d.dll which tries to load all of its dependencies including tbb_debug.dll. System tries to find tbb_debug.dll 32bit (because my application is 32bit) but when it can’t it tries to find 64bit version and it can, so it tries to load it and here is the error comes from.
To solve this I remove "E:\Intel\Compiler\11.154\tbb\intel64\vc9\bin" from the PATH variable, so when I tries to run my application system can’t find any tbb_debug.dll (neither 32bit nor 64bit version) so it throws a new error now says that tbb_debug.dll is not found.
The last step I made was coping the 32bit version of tbb_debug.dll and but it near my application executable file so now when system tries to load tbb_debug.dll it will find the 32bit version of it (also dependency walker will do that so there isn’t any 64bit dll in my dependencies now) and my application comes back to life again.

March 4, 2012

Enable Windows 8 Metro UI in Windows 7 | Enjoy Windows 8 on your Windows 7


Although Windows 8 Pre Beta a Developer's Preview is available for user's to download from the Microsoft MSDN Website. The Pre Beta version may not be stable and may cause errors to your regular machine. Its highly recommended not to install the pre beta version on productive machines. To download yourself a copy of the Developer's Preview please go to Windows 8 Developer's Preview ISO Downloads

This article will show you how to install the Metro UI of windows 8 on to your windows 7 operating systems. The steps are easy and quick. 


This is how my Windows 7 desktop looks like. This is as similar to the Windows 8 UI. You can modify or alter the settings of the tiles as per your requirements. You can get your gmail or hotmail account live on the tiles. Internet Explorer, Picture slides, Computer and many more. Apart from this you will also get all the restart, sleep, logoff and shutdown buttons right on this interface. So what are you waiting for just follow the steps below :

Step 1. First download a copy of Rain meter on your Windows 7 OS according to your 32 or 64 bit system.

Step 2. If its in a Zip file, normally it won't if you download it from the rain meter website itself. But if its in a Zip file, extract those and install as per instructions available.

Step 3. After you are done installing, Download the theme Omnimo 3.1 skin for rain meter.

Step 4. Extract the file and double click on omnimo.rmskin and follow the instructions accordingly.

Step 5. Once you are done installing the theme or skin as well. Kindly configure the tiles as per your requirements. That's it you are done installing the Windows 8 Metro UI on Windows 7.

Increase Your RAM and System Speed

1). Start any application, say Word. Open some large documents.


2). Press
CTRL+SHIFT+ESC to open Windows Task Manager and click Processes tab and sort the list in descending order on Mem Usage. You will notice that WINWORD.EXE will be somewhere at the top, using multiple MBs of memory.


3). Now switch to Word and simply minimize it. (Don't use the Minimize All Windows option of the task bar).


4). Now go back to the Windows Task Manager and see where WINWORD.EXE is listed. Most probably you will not find it at the top. You will typically have to scroll to the bottom of the list to find Word. Now check out the amount of RAM it is using. Surprised? The memory utilization has reduced by a huge amount.

5). Minimize each application that you are currently not working on by clicking on the Minimize button & you can increase the amount of available RAM by a substantial margin. Depending upon the number and type of applications you use together, the difference can be as much as 50 percent of extra RAM.

                In any multitasking system, minimizing an application means that it won't be utilized by the user right now. Therefore, the OS automatically makes the application use virtual memory & keeps bare minimum amounts of the code in physical RAM.

Boost Windows Xp Speed Upto 60%

Whenever you start your computer, you are faced with a few moments of thumb twiddling while Windows XP boots and prompts you to log on. Although you should expect to wait for a few moments, sometimes Windows XP seems to boot rather slowly. In fact, you may notice that over a period of time the PC that used to roar to life seems a bit sluggish instead. Fortunately, you can perform several techniques that help Windows XP get the bootup speed you want. This chapter explores how to put these techniques to work.

Some of the things may already have been discussed in some threads earlier

Stopping Unneeded Startup Services

Along with the core operating system and programs that Windows XP runs when it starts, there is also a host of services involved. Many of these services are necessary for Windows XP to operate correctly. However, many of them are for features in Windows XP that you may not use at all. You can peruse the services and disable any service that you do not want to run. The fewer services that run, the more quickly Windows XP will boot.

Caution: Exercise caution when stopping services. If you do not know what a service does or are unsure of the ramifications of stopping the service, leave it alone. Some services are critical to Windows XP's operations, so make sure you understand what the service is before you disable it.

To reduce the number of services that start on bootup, you can access two different areas of Windows XP. The first is the System Configuration Utility. The Services tab shows you the services that start when the computer boots.

You can stop a service from starting by simply clearing the check box next to the service and clicking OK. However, before you do so, there is another way to disable services that you may prefer because the interface gives you more information about the service in question.

Open Control Panel/Administrative ToolsServices or else select Start/Run, type services.msc, and click OK. Either way, you see the Services console.

I prefer to use the Services console instead of the System Configuration Utility because it describes what the service does. Additionally, you can double-click a service and examine its properties.

Notice the Startup Type column in Figure 4-2. This information lists whether the service is automatic or manual. Manual services are only started in Windows XP when you start a process that requires the service. Some other process may require the service that has a "dependency" relationship with it; in this case, the dependency service will start, as well. Because these services do not start automatically when you boot Windows XP, you do not need to do anything with manual services.

However, all services listed as automatic start when Windows XP boots. These are the services that increase boot time. As I have mentioned, many of them are necessary and important, so you should not stop automatic services from booting unless you are sure of the ramifications. You can get this information by looking at the Description column. Here's a quick look at common services you may want to live without:
Automatic Updates: This service enables Windows XP to check the Web automatically for updates. If you don't want to use
Automatic Updates, you can disable the service. You can always check for updates manually at the Windows Update Web site.
Computer Browser: If your computer is not on a network, you don't need this service. If you are on a network, leave it alone.
DHCP Client: If you are not on a network, you do not need this service. If you are on a small workgroup, you can still increase boot time by configuring manual IP addresses (which I explore later in this chapter).

DNS Client: If you are not on a network, you do not need this service. If you are, leave it alone.

Error Reporting and Event Log: You don't have to use these services but they can be very helpful, so I would leave them configured as automatic.

Fax: If you don't use your computer for fax services, you can disable this one. Help and Support: If you never use the Windows XP

Help and Support Center (found on the Start menu), you can disable this service.

IMAPI CD-Burning COM: This service enables you to burn CDs on your computer. If you never burn CDs, you can disable the service.

Indexing Service: Your computer keeps an index of files but if you rarely search for files, the service is just a resource hog. You can stop it and turn the service to manual.

Windows Firewall/Internet Connection Sharing: If you do not use these features, you can disable them.

Infrared Monitor: If you do not use infrared devices, you can disable this service.

Messenger: This service sends alert messages on a local area network (it is not the same as Windows Messenger). If you are not on a network, you can disable this service.

Print Spooler: If you do not do any printing from the computer, you can disable this service. If you print, make sure you leave it as automatic.

Remote Registry: This service allows remote users to modify the Registry on your computer. If you are not on a network, you can disable this service.

System Restore Service: This service allows you to use System Restore. If you have turned off System Restore anyway, you do not need to turn off the service. If you do, you turn off System Restore.

Themes: If you do not use themes, you can disable this service.

Windows Image Acquisition: If you do not use scanners or digital cameras, you can disable this service.

Wireless Zero Configuration: If do not use wireless networking devices, you can disable this service.
You may have a number of other automatic services, depending on software and other configurations on your computer. So it's a good idea to look through the services and learn more about them. If you double-click a service, a Properties dialog box appears

Notice that on the General tab, you see a Startup Type drop-down menu. If you want to change an automatic service to manual, select Manual here and click OK. As a general rule, don't disable a service unless you are sure you will never use it.


However, manual configuration allows the service to be started when you find it necessary, thus speeding up your boot time. However, before you change a service to manual, look at the Dependencies tab (see Figure 4-4). This tab shows you which other services depend upon the service you are considering changing.

Keep in mind that services are necessary for the vast functionality you get with Windows XP. Change only those services that you understand and do not use. How you use your Windows XP computer should be the best guide in terms of optional startup services.

Tips:
The Indexing service and the System Restore service take up a lot of disk space and system resources across the board.
You can live without the Indexing service but I suggest that you keep using System Restore. It works great when you are in a bind and this is one case where the loss of speed may not be worth the ramifications of not using System Restore. Speed Tips and Tricks for Windows XP Startup Aside from startup programs, services, and the Prefetch folder, there are a number of other startup procedures and issues you can modify to help Windows XP start faster. The following sections explore those tips and tricks. Manual IP Addressing on Small Office/Home Networks Windows XP is configured to help you take care of networking. It uses the TCP/IP protocol for networking in workgroups, or what you might call small office or home networks that do not use a dedicated server. The problem is that automatic IP addressing can be slow. When your computer boots, it has to query the network to see what IP addresses are already in use and then assign itself one. If you want to speed up the boot time a bit, consider manually assigning IP addresses to all computers on the network. This way, the network computers do not have to worry about locating an automatic IP address. Because one is manually configured, the operating system doesn't have to spend time solving this problem. This isn't a networking book, however, so I won't delve into the implications of using a manual IP address, but if you are using a computer that functions as a host computer to the Internet (using Internet Connection Sharing [ICS]), you can get into connectivity problems if you change the configuration of the IP address. However, you can still work around this problem by starting with the ICS host computer. Select Start/Connect To/Show All Connections. Right-click your network adapter card and click Properties. On the General tab, select TCP/IP in the list of services and click the Properties button. In the TCP/IP properties, you can see if you use an automatic or manual IP address. In the example in Figure 4-5, I have configured a manual IP address of 90.0.0.1 and a default subnet mask. The other computers on my office network each use a different IP address in the same class, such as 90.0.0.2, 90.0.0.3, 90.0.0.4, and so on. This way, each computer has a permanent IP address, which helps increase boot time. Note that if you change the IP addresses of your computers, they must all use the same subnet mask. A default subject mask of 255.255.255.0 will keep you in good shape. Make sure you understand the implications of changing IP addresses on your network. If you have no networking experience at all, you may be wiser to leave the automatic IP addressing as is and try to gain some speed using the additional suggestions in this chapter. Disabling Recent Documents History Windows XP includes a feature that keeps track of all recent documents you have opened or used. The idea is that you can select Start/Recent Documents History and quickly reopen any document you have recently used. I use many documents each day and never use the feature myself. In my opinion, I can keep up with what I want to use without Windows XP doing it for me. The bad thing about Recent Documents History is that Windows XP has to calculate what should be put there each time you boot Windows, which can slow things down. So, if you never use the Recent Documents History, it's a good idea to disable it.

Here's how:
1. Open the Registry Editor (select Start/Run, type regedit, and click OK).
2. Navigate to HKEY_CURRENT_USER\Software\Mcft\Windows\ CurrentVersion\Policies\Explorer.
3. Create a NoRecentDocsHistory D_WORD key. Double-click the value to open it once it is created.
4. Set the Data Value to 1 to enable the restriction.
5. Click OK and close the Registry Editor. You'll need to restart the computer for the change to take effect. Disabling the Boot Logo You can remove the boot logo that appears when you start Windows XP. This little tweak probably shaves only a few seconds off your boot time but seconds count if you are serious about trying to get Windows XP up and running as quickly as possible. The only negative is that if you remove the boot logo, you will also not see any boot messages, such as check disk. (But if you are not having problems with your computer, this isn't such a big deal.)
To remove the boot logo, follow these steps:
1. Select Start/Run, type msconfig, and click OK.
2. In the System Configuration Utility, click the BOOT.INI tab.
3. On the BOOT.INI tab, click the NOGUIBOOT check box option. Click OK. Removing Unwanted Fonts One trick that increases your boot time a bit is to lose any fonts in the Fonts folder in Control Panel that you never use. The more fonts you have, the more processing Windows XP has to do to prep all of those fonts for use. You must be a bit careful here to not remove fonts that you might want, but there is a good chance that you can live without many of them. For instance, you may have foreign language fonts and other symbol fonts (such as Wingdings) that you never use. To delete unneeded fonts, follow these steps:
1. Open the Fonts folder in Control Panel.
2. Select Edit/Select All and then Edit/Copy.
3. Create a new folder on your desktop, open it, and select Edit/Paste.
4. In this new folder, delete any of the fonts you do not want.
5. Return to the Fonts folder in Control Panel. Right-click the selected fonts and click Delete.
6. Go back to your new desktop folder and click Edit/Select All.
7. Return to your Fonts folder and click Edit/Paste. You now have only the desired fonts in the Fonts folder. Tip: You can directly delete fonts from the Fonts folder without creating the secondary folder. However, I recommend the preceding steps to help ensure that you do not make a mistake in the deletion process. Stopping Remote Assistance and Remote Desktop Sharing In Windows XP Professional, you have two remote networking features called Remote Assistance and Remote Desktop Sharing. These remote networking features are very helpful in a variety of situations but if you don't use them, it is good idea to disable them to save boot time. You can always enable them later if you want to use them. Note: If you are interested in using Remote Desktop or Remote Assistance, see my book Windows XP for Power Users: Power Pack published by John Wiley & Sons.
1. Open the Start menu, right-click My Computer, and choose Properties.
2. Click the Remote Tab.
3. Clear both check boxes to disable Remote Assistance and Remote Desktop. Speeding Up the Dual-Boot Timeout If you dual-boot your computer with Windows XP and another operating system, you see an operating system selection menu on startup. If you typically boot into Windows XP and not the other operating system, you can speed up the dual-boot timeout value so that you do not wait so long for the boot process to select your default operating system and continue with the boot process. The default timeout value is 30 seconds but you can change this setting to 10. This gives you enough time to select the alternate operating system if you want but also speeds up the boot process. You can skip this section if you do not use a dual-boot configuration.
Follow these steps:
1. Locate the boot.ini file on your computer. It is a hidden file by default; mine is located in C:\boot.ini.
2. Open the file with Notepad (which is what opens it by default).
3. Change the Timeout value to 10 (see Figure 4-11).
4. Select File/Save and close Notepad. Speeding Up Your PPPoE Connection If you use a Point-to-Point Protocol connection over Ethernet (PPPoE), you may notice a delay in using the PPPoE connection after startup. By default, there is a 120 second delay but you can stop this behavior by manually configuring an IP address for the network adapter card. If you do not use a PPPoE connection, you can skip this section.
1. Select Start/Connect to/Show All Connections.
2. Open the TCP/IP properties for your LAN network interface card.
3. Manually set the IP address on the TCP/IP properties to an appropriate IP address and subnet mask for your network. Reducing the Wait Time When you start to shut down Windows XP, it has to quit, or "kill," any live applications or processes that are currently running. So close all applications first. However, some applications and processes are always running in the background. You can reduce the amount of time that Windows XP waits for those applications and processes to close before Windows XP kills them. Edit three different Registry settings to change this:
1. Open the Registry Editor.
2. Navigate to HKEY_CURRENT_USER\Control Panel\Desktop. Select WaitToKillAppTimeout and set the value to 1000.
3. Select the HungAppTimeout value and set it to 1000 as well. 4
. Navigate to HKEY_USERS\.DEFAULT\Control Panel\Desktop. Set the WaitToKillAppTimeout and set the value to 1000. Select the HungAppTimeout \newline value and set it to 1000 as well.
5. Navigate to HKEY_LOCAL_MACHINE\System\CurrentControlSet\Contro l. Select the WaitToKillServiceTimeout value and set it to 1000.
6. Close the Registry Editor. Automatically Killing Tasks on Shutdown You know the drill. You start to shut down the computer, you wait a few moments, and then you see a dialog box asking if you want to kill an application or service that is running. Instead of prompting you, you can make Windows XP take care of the kill task automatically. Here's how:
1. Open the Registry Editor.
2. Navigate to HKEY_CURRENT_USER\Control Panel\Desktop.
3. Highlight the value AutoEndTasks and change the value to 1.
4. Close the Registry Editor.

Click to Download our Android App